So richtest du Notenpult ein, holst deine ersten Noten in die Bibliothek und öffnest ein Stück.
Willkommen
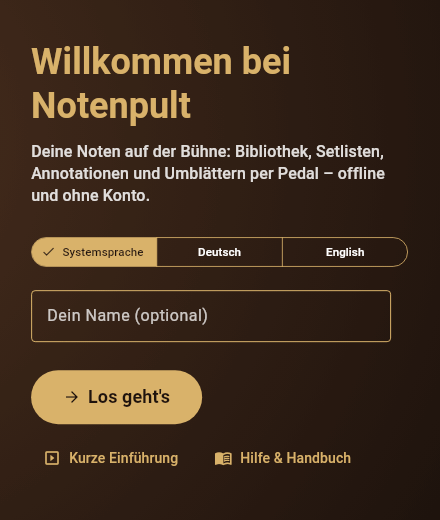
Beim ersten Start auf einem Gerät begrüßt dich der Bildschirm Willkommen bei Notenpult. Hier legst du zwei Dinge fest:
Sprache:Systemsprache, Deutsch oder English. Du kannst sie später jederzeit unter Einstellungen › Darstellung › Sprache ändern.
Dein Name (optional): So sehen dich die anderen Mitglieder, wenn du später eine Gruppe mit deiner Band oder deinem Ensemble teilst. Du kannst das Feld leer lassen und den Namen später unter Einstellungen › Dein Profil eintragen.
Die Kurze Einführung zeigt dir auf ein paar Wischseiten das Wichtigste. Tippe danach auf Los geht's.
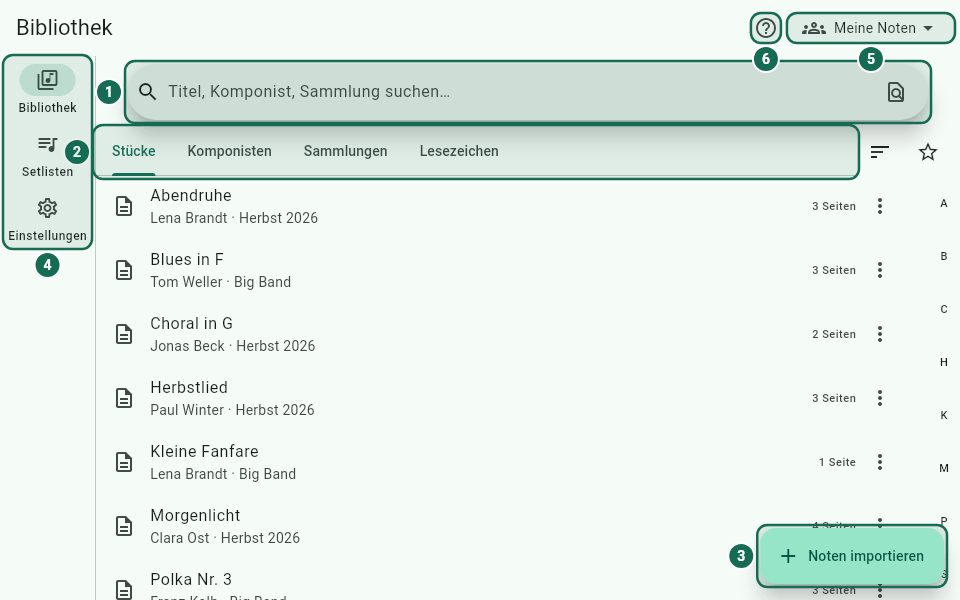
Nach dem Start landest du in der Bibliothek. Die App hat drei Bereiche, zwischen denen du über die Leiste wechselst – auf Tablets und am Computer links am Rand, auf schmalen Bildschirmen unten:
Bibliothek: alle deine Stücke, mit Suche, Sortierung und Reitern.
Setlisten: deine Programme für Konzert, Gottesdienst oder Probe, siehe Setlisten.
Einstellungen: Darstellung, Notenansicht, Pedale, Backup und mehr, siehe Einstellungen.
Oben in der Bibliothek findest du:
Das Suchfeld (Titel, Komponist, Sammlung suchen…), siehe Suchen.
Rechts in der oberen Leiste den Gruppen-Umschalter mit dem Namen der geöffneten Bibliothek. Damit wechselst du zwischen mehreren Bibliotheken, z. B. einer pro Band, siehe Mehrere Bibliotheken.
Die Schaltfläche Fernbedienung (nur auf Geräten, die die Bühnenkopplung beherrschen). Damit steuerst du ein eigenes Gerät, das gerade leitet, z. B. vom Smartphone aus, siehe Fernbedienung.
Den ?-Knopf (Hilfe), der dieses Handbuch an der passenden Stelle öffnet.
Unten rechts sitzt die Schaltfläche Noten importieren mit allen Wegen, neue Noten hinzuzufügen.
Die ersten Noten importieren
Solange die Bibliothek leer ist, siehst du Deine Bibliothek ist leer und einen Knopf Noten importieren.
So geht's:
Tippe auf Noten importieren.
Wähle im Datei-Dialog eine oder mehrere Dateien aus: PDFs, Bilder (PNG, JPG, WebP, GIF, BMP), Textdateien (.txt) oder ChordPro-Songs (.cho, .chordpro, .crd, .pro).
Hast du schon Setlisten, fragt Notenpult, ob die neuen Stücke gleich in eine Setliste sollen (Zur Setliste hinzufügen) – oder Keine Setliste.
Fertig: Unten erscheint z. B. 3 Stücke importiert.
Notenpult übernimmt Titel, Autor und Schlagwörter aus dem PDF, sofern die Datei sie enthält; sonst wird der Dateiname zum Titel. Du kannst alles später unter Details bearbeiten ändern.
Weitere Wege – ganzer Ordner, Ziehen und Ablegen, Kamera, Zwischenablage, Songbook aufteilen – findest du im Kapitel Noten importieren.
Ein Stück öffnen
Tippe in der Liste auf ein Stück – es öffnet sich in der Notenansicht. Dort blätterst du mit einem Tipp rechts bzw. links auf das Blatt, mit Wischen oder mit einem Pedal (Seitenwender).
Ein Tipp in die Mitte zeigt die Bedienleiste mit dem Menü Werkzeuge.
Am Computer schließt Esc die Notenansicht wieder.
Für Auftritte gibt es den Performance-Modus, der Fehlbedienungen verhindert, siehe Performance-Modus.
Alles Weitere zur Notenansicht steht im Kapitel Notenansicht.
Hilfe in der App
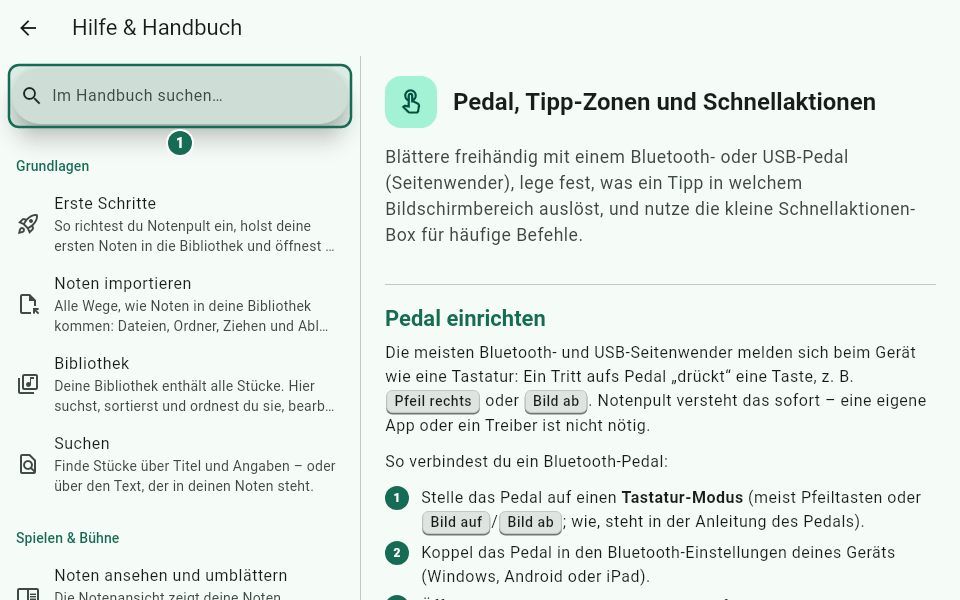
1 Im Handbuch suchen
Hilfe bekommst du an mehreren Stellen:
?-Knopf: In der oberen Leiste der Hauptbildschirme und in einigen Dialogen öffnet der ?-Knopf (Hilfe) genau den passenden Abschnitt dieses Handbuchs.
Handbuch: Unter Einstellungen › Hilfe › Hilfe & Handbuch findest du alle Kapitel und eine Volltextsuche. Am Computer öffnet F1 das Handbuch überall außerhalb der Notenansicht.
In der Notenansicht: Dort zeigt F1 oder ? die Übersicht der Tastenkürzel; darin führt Handbuch öffnen zum Handbuch. Außerdem gibt es im Menü Werkzeuge den Eintrag Hilfe.
Tipps: Auf wichtigen Bildschirmen erscheint einmalig eine kleine Sprechblase. Weiter zeigt den nächsten Tipp, Fertig schließt sie, Nicht mehr anzeigen schaltet alle Tipps ab. Ein Tipp irgendwo anders schließt die Blase ebenfalls. Im Performance-Modus erscheinen nie Tipps.
Kurze Einführung: Die Wischseiten vom Willkommensbildschirm kannst du jederzeit unter Einstellungen › Hilfe erneut ansehen.
Wie du Tipps ein- und ausschaltest oder zurücksetzt, steht unter Tipps und Hilfe. Alle Tastenkürzel findest du unter Tastenkürzel.
How to set up Notenpult, bring your first scores into the library and open a score.
Welcome
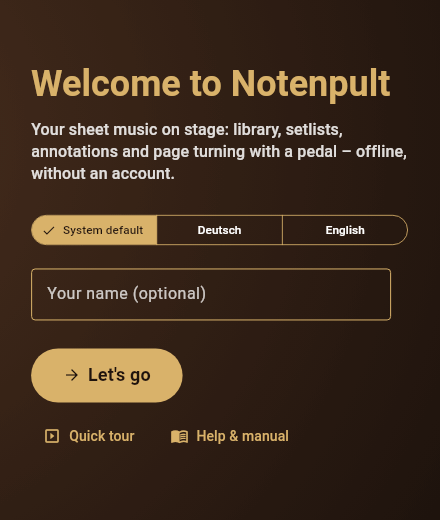
The first time you start the app on a device, the Welcome to Notenpult screen greets you. You choose two things here:
Language:System default, Deutsch or English. You can change it at any time under Settings › Appearance › Language.
Your name (optional): This is how other members see you once you share a group with your band or ensemble. You can leave the field empty and enter your name later under Settings › Your profile.
The Quick tour shows you the essentials on a few swipe pages. Then tap Let's go.
The library at a glance
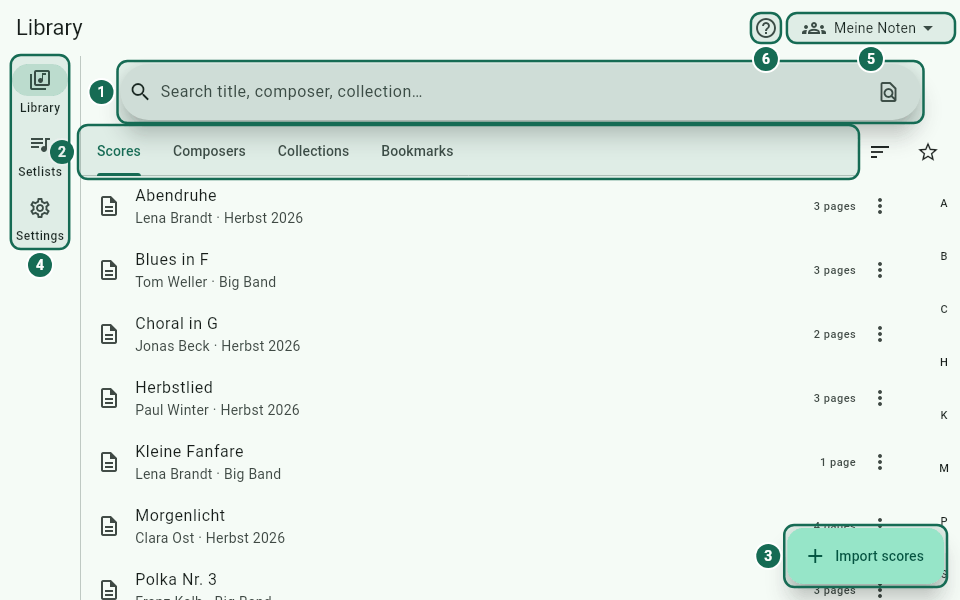
1 Search field · 2 Tabs · 3 Import scores · 4 Navigation: Library, Setlists, Settings · 5 Group switcher · 6 Help
After starting, you land in the Library. The app has three areas; switch between them with the navigation bar – on tablets and computers on the left edge, on narrow screens at the bottom:
Library: all your scores, with search, sorting and tabs.
Setlists: your programmes for concerts, services or rehearsals, see Setlists.
Settings: appearance, viewer, pedals, backup and more, see Settings.
At the top of the library you find:
The search field (Search title, composer, collection…), see Search.
On the right of the top bar, the group switcher with the name of the open library. Use it to switch between several libraries, e.g. one per band, see Several libraries.
The Remote control button (only on devices that support stage coupling). Use it to control one of your own devices that is currently leading, e.g. from your phone, see Remote control.
The ? button (Help), which opens this manual at the right place.
In the bottom right corner sits the Import scores button with every way to add new sheet music.
Importing your first scores
As long as the library is empty, you see Your library is empty and an Import scores button.
Here's how:
Tap Import scores.
In the file dialog, choose one or more files: PDFs, images (PNG, JPG, WebP, GIF, BMP), text files (.txt) or ChordPro songs (.cho, .chordpro, .crd, .pro).
If you already have setlists, Notenpult asks whether the new scores should go straight into a setlist (Add to setlist) – or No setlist.
Done: a message such as 3 scores imported appears at the bottom.
Notenpult takes the title, author and keywords from the PDF if the file contains them; otherwise the file name becomes the title. You can change everything later with Edit details.
Other ways – a whole folder, drag and drop, camera, clipboard, splitting a songbook – are described in the chapter Importing scores.
Opening a score
Tap a score in the list – it opens in the score view. There you turn pages by tapping on the right or left of the page, by swiping or with a pedal (page turner).
A tap in the middle shows the control bar with the Tools menu.
On a computer, Esc closes the score view again.
For gigs there is performance mode, which prevents accidental input, see Performance mode.
Everything else about the score view is in the chapter Score view.
Help in the app
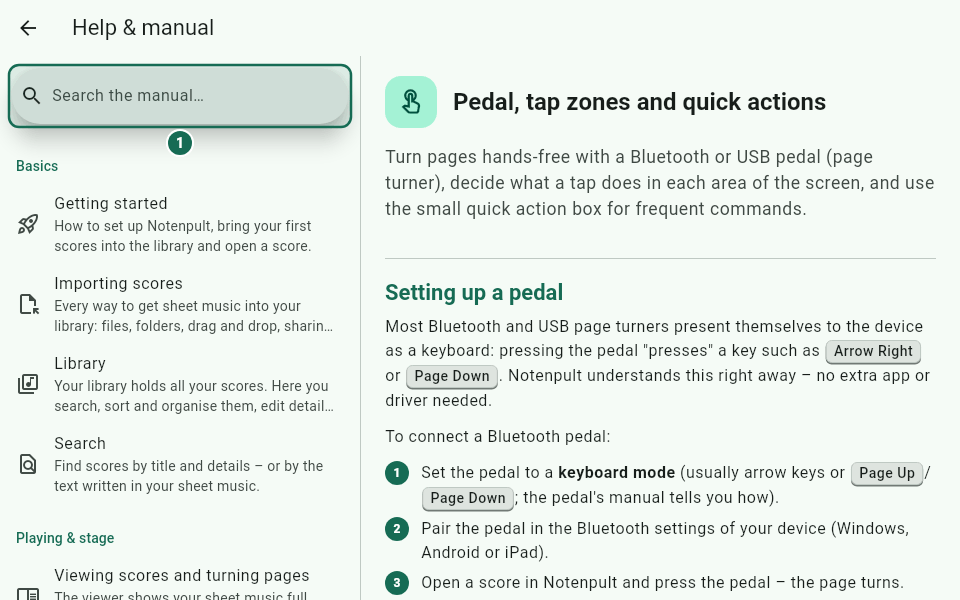
1 Search the manual
You get help in several places:
? button: In the top bar of the main screens and in some dialogs, the ? button (Help) opens exactly the matching section of this manual.
Manual: Under Settings › Help › Help & manual you find all chapters and a full-text search. On a computer, F1 opens the manual anywhere outside the score view.
In the score view: There, F1 or ? shows the keyboard shortcut overview; its Open manual button takes you to the manual. The Tools menu also has a Help entry.
Tips: On important screens a small bubble appears once. Next shows the next tip, Done closes it, Don't show again switches all tips off. Tapping anywhere else also closes the bubble. Tips never appear in performance mode.
Quick tour: You can watch the swipe pages from the welcome screen again at any time under Settings › Help.
How to switch tips on and off or reset them is described under Tips and help. All keyboard shortcuts are listed under Keyboard shortcuts.