Blättere freihändig mit einem Bluetooth- oder USB-Pedal (Seitenwender), lege fest, was ein Tipp in welchem Bildschirmbereich auslöst, und nutze die kleine Schnellaktionen-Box für häufige Befehle.
Pedal einrichten
Die meisten Bluetooth- und USB-Seitenwender melden sich beim Gerät wie eine Tastatur: Ein Tritt aufs Pedal „drückt“ eine Taste, z. B. Pfeil rechts oder Bild ab. Notenpult versteht das sofort – eine eigene App oder ein Treiber ist nicht nötig.
So verbindest du ein Bluetooth-Pedal:
Stelle das Pedal auf einen Tastatur-Modus (meist Pfeiltasten oder Bild auf/Bild ab; wie, steht in der Anleitung des Pedals).
Koppel das Pedal in den Bluetooth-Einstellungen deines Geräts (Windows, Android oder iPad).
Öffne ein Stück in Notenpult und tritt aufs Pedal – die Seite wechselt.
Ab Werk sind diese Tasten belegt:
Pfeil rechts, Bild ab, Pfeil runter: Nächste Seite
Pfeil links, Bild auf, Pfeil hoch: Vorherige Seite
In den Einstellungen erscheinen die Tasten mit ihren englischen Namen, z. B. Arrow Right oder Page Down.
Tasten anlernen und belegen
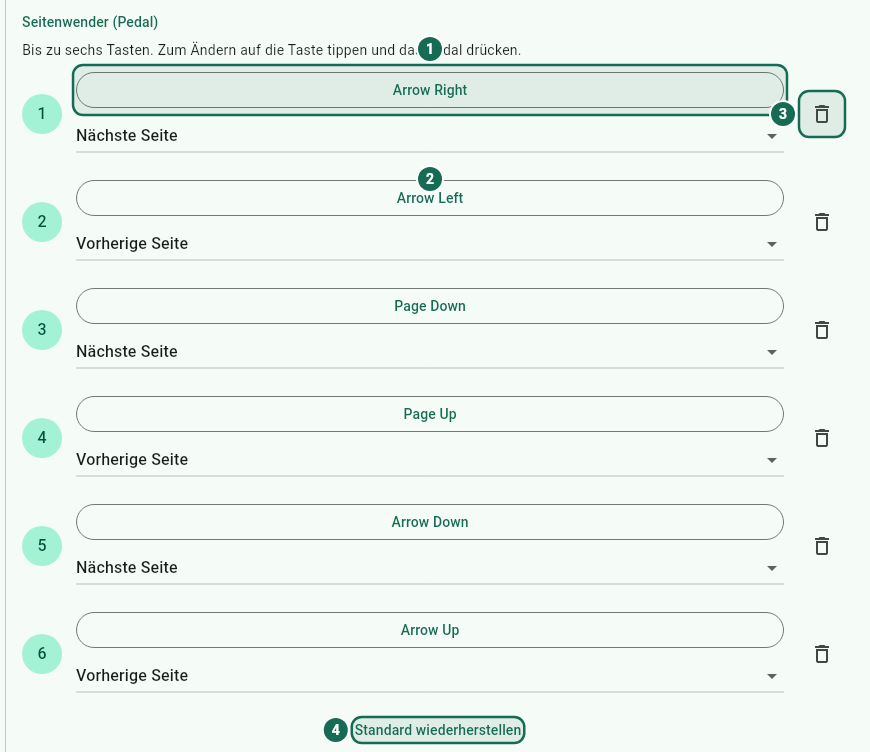
Unter Einstellungen › Seitenwender (Pedal) legst du bis zu sechs Tasten fest. Jede Zeile hat eine Nummer, einen Knopf mit dem Tastennamen und darunter die Aktion.
Tritt aufs Pedal (oder drücke die gewünschte Taste). Notenpult übernimmt sie sofort.
Wähle darunter die Aktion, z. B. Nächstes Stück.
Mit Taste hinzufügen lernst du eine weitere Taste an (sie bekommt zuerst die Aktion Nächste Seite). Mit dem Papierkorb-Symbol entfernst du eine Zeile, mit Standard wiederherstellen kehrst du zur Werksbelegung zurück. Esc lässt sich nicht anlernen; damit brichst du das Anlernen ab.
Pedale mit zwei oder mehr Schaltern kannst du so doppelt nutzen, z. B. links Vorherige Seite, rechts Nächste Seite und einen dritten Schalter für Link Point auf dem Bildschirm folgen.
MIDI-Pedale (z. B. ein Haltepedal am Keyboard) richtest du unter Einstellungen › MIDI › MIDI-Aktionen ein, siehe MIDI-Aktionen anlernen.
Die Pedal-Belegung gilt für dieses Gerät. Mit Einstellungsprofilen wechselst du sie zusammen mit anderen Einstellungen auf einen Schlag, z. B. zwischen „Üben“ und „Auftritt“.
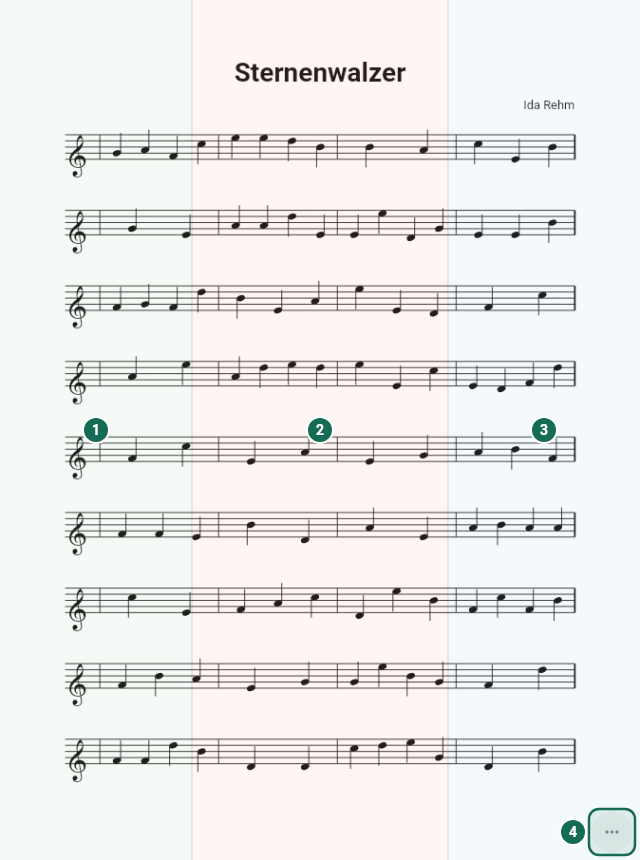
Der Bildschirm der Notenansicht ist in neun Bereiche aufgeteilt. Ein kurzer Tipp in einen Bereich löst dessen Aktion aus:
Linke Seite und Rechte Seite: je ein Streifen von knapp einem Drittel der Breite.
Mitte: der große Bereich dazwischen.
Rand oben und Rand unten: schmale Streifen oben und unten in der Mitte.
Ecke oben links, Ecke oben rechts, Ecke unten links, Ecke unten rechts: kleine Quadrate in den Ecken.
Ab Werk gilt: Linke Seite blättert zurück, Rechte Seite blättert vor, Mitte blendet die Bedienleiste ein und aus. Die Ecken machen dasselbe wie die angrenzende linke bzw. rechte Seite, die Ränder oben und unten dasselbe wie die Mitte.
Die eingefärbten Bereiche
Damit du immer weißt, wohin du tippen musst, sind die Bereiche dezent auf der Seite eingezeichnet: Jede Aktion hat ihre eigene zarte Farbe und ein kleines Symbol. Bereiche mit derselben Aktion haben dieselbe Farbe und wirken wie eine Fläche. Die Färbung bleibt auch im Performance-Modus sichtbar; beim Annotieren wird sie ausgeblendet.
Stört dich die Färbung, schalte sie unter Einstellungen › Seitenwender (Pedal) › Tipp-Zonen auf dem Blatt anzeigen aus. Die Bereiche funktionieren dann weiter, nur unsichtbar.
Die neun Bereiche sind so angeordnet wie auf dem Bildschirm.
Wähle für jeden Bereich eine Aktion aus der Liste.
Neben allen Aktionen gibt es zwei besondere Einträge:
Keine Aktion – ein Tipp dort tut nichts. Praktisch, damit du beim Anfassen des Tablets nicht versehentlich blätterst.
Wie der Nachbarbereich (nur Ecken und Ränder) – der Bereich übernimmt die Aktion der linken Seite, der rechten Seite bzw. der Mitte.
Ein Doppeltipp in die Mitte setzt eine gezoomte Seite auf die ganze Seite zurück (siehe Zoomen); bei Doppelseite und Buch wechselt er sonst zwischen „Ganze Seite“ und „An Breite anpassen“ (siehe Größe der Seite) – solange die Mitte die Bedienleiste schaltet. Tipp-Zonen blättern auch auf einer gezoomten Seite um.
Während du annotierst, einen Link Point oder Smart Button anlegst, reagieren die Tipp-Zonen nicht.
Schnellaktionen-Box
Performance-Modus, Auto-Scroll, Nachtmodus und eine frei wählbare Aktion
Die Schnellaktionen-Box ist ein kleiner, halb durchsichtiger runder Knopf mit drei Punkten in einer Ecke der Notenansicht (ab Werk unten rechts). Sie ist auch im Performance-Modus da – so erreichst du wichtige Befehle, ohne die Bedienleiste zu öffnen. Ist die Bedienleiste eingeblendet, rückt die Box über bzw. unter sie, damit nichts verdeckt wird.
So benutzt du sie:
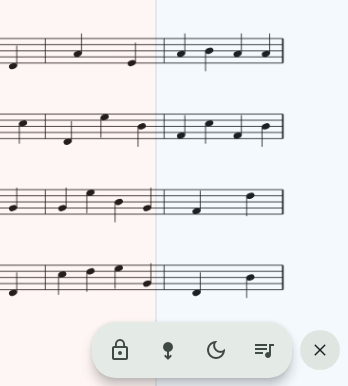
Tippe auf den Knopf mit den drei Punkten. Eine Reihe mit Symbolen klappt auf.
Tippe auf eine Aktion. Die Reihe klappt wieder zu.
Mit dem X schließt du die Reihe, ohne etwas auszulösen.
Die Knöpfe in der Box:
Performance-Modus an/aus (Schloss)
Auto-Scroll starten/stoppen
solange Auto-Scroll läuft: Auto-Scroll langsamer und Auto-Scroll schneller, siehe Schneller und langsamer
Nachtmodus an/aus (Mond)
ein frei wählbarer letzter Knopf – ab Werk Setliste anzeigen
nur wenn du per Kopplung einem anderen Gerät folgst: Seitenwechsel folgen an/aus und Stückwechsel folgen an/aus
Was gerade eingeschaltet ist (z. B. der Nachtmodus), ist hervorgehoben. Hältst du den Finger auf ein Symbol bzw. fährst mit der Maus darüber, erscheint sein Name.
Turn pages hands-free with a Bluetooth or USB pedal (page turner), decide what a tap does in each area of the screen, and use the small quick action box for frequent commands.
Setting up a pedal
Most Bluetooth and USB page turners present themselves to the device as a keyboard: pressing the pedal "presses" a key such as Arrow Right or Page Down. Notenpult understands this right away – no extra app or driver needed.
To connect a Bluetooth pedal:
Set the pedal to a keyboard mode (usually arrow keys or Page Up/Page Down; the pedal's manual tells you how).
Pair the pedal in the Bluetooth settings of your device (Windows, Android or iPad).
Open a score in Notenpult and press the pedal – the page turns.
These keys are assigned out of the box:
Arrow Right, Page Down, Arrow Down: Next page
Arrow Left, Page Up, Arrow Up: Previous page
The settings show the keys with their English names, e.g. Arrow Right or Page Down.
Learning and assigning keys
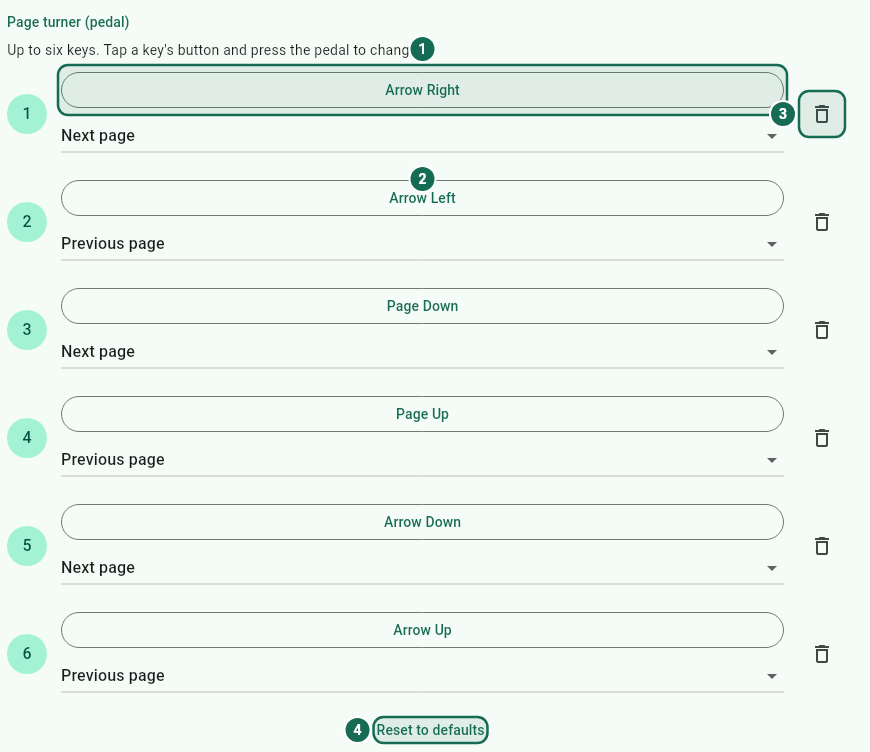
Under Settings › Page turner (pedal) you define up to six keys. Each row has a number, a button with the key name and the action below it.
1 Learn a key · 2 Choose the action · 3 Remove the row · 4 Reset to defaults
Tap the button with the key name.
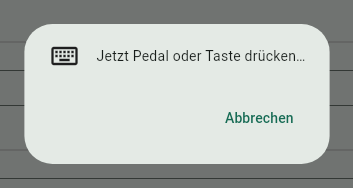
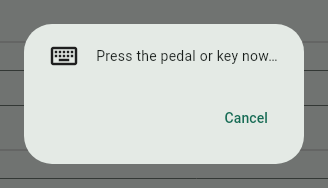
Press the pedal or key now… appears.
Press the pedal (or the key you want). Notenpult takes it over at once.
Choose the action below, e.g. Next score.
Add key learns another key (it starts with the action Next page). The bin icon removes a row, Reset to defaults returns to the factory assignment. Esc cannot be learned; it cancels learning.
That way you can use pedals with two or more switches, e.g. left Previous page, right Next page and a third switch for Follow link point on screen.
MIDI pedals (e.g. a sustain pedal on a keyboard) are set up under Settings › MIDI › MIDI actions, see Learning MIDI actions.
The pedal assignment applies to this device. With settings profiles you switch it together with other settings in one step, e.g. between "Practice" and "Gig".
The viewer screen is divided into nine areas. A short tap in an area triggers its action:
Left side and Right side: strips of almost a third of the width each.
Centre: the large area in between.
Top edge and Bottom edge: narrow strips at the top and bottom of the centre.
Top left corner, Top right corner, Bottom left corner, Bottom right corner: small squares in the corners.
Out of the box: Left side turns back, Right side turns forward, Centre shows and hides the controls. The corners do the same as the adjacent left or right side, the top and bottom edges the same as the centre.
The tinted areas
So that you always know where to tap, the areas are drawn subtly on the page: each action has its own soft colour and a small icon. Areas with the same action share a colour and look like one area. The tint stays visible in performance mode too; it is hidden while you annotate.
If the tint bothers you, switch it off under Settings › Page turner (pedal) › Show tap zones on the page. The areas keep working, just invisibly.
Assigning areas
Open Settings › Page turner (pedal) › Touch zones.
The nine areas are laid out like the screen.
Choose an action from the list for each area.
Besides all actions there are two special entries:
No action – a tap there does nothing. Useful so you don't turn by accident when you touch the tablet.
Like the neighbouring area (corners and edges only) – the area takes over the action of the left side, the right side or the centre.
A double tap in the centre resets a zoomed page to the whole page (see Zooming); otherwise, in two pages and book, it switches between "Whole page" and "Fit width" (see Page size) – as long as the centre toggles the controls. Tap zones turn pages on a zoomed page, too.
While you annotate or create a link point or smart button, the tap zones do not react.
Quick action box
Performance mode, auto-scroll, night mode and an action of your choice
The quick action box is a small, semi-transparent round button with three dots in a corner of the viewer (bottom right out of the box). It is there in performance mode too – so you reach important commands without opening the controls. While the controls are shown, the box moves above or below them so nothing is covered.
How to use it:
Tap the button with the three dots. A row of icons unfolds.
Tap an action. The row folds up again.
The X closes the row without triggering anything.
The buttons in the box:
Performance mode on/off (padlock)
Auto-scroll start/stop
while auto-scroll runs: Auto-scroll slower and Auto-scroll faster, see Faster and slower
Night mode on/off (moon)
a freely chosen last button – Show setlist out of the box
only while you follow another device via coupling: Follow page turns on/off and Follow score changes on/off
Whatever is currently switched on (e.g. night mode) is highlighted. Hold your finger on an icon or hover over it with the mouse to see its name.
Setting up the box
Under Settings › Page turner (pedal):
Quick action box: choose Top left corner, Top right corner, Bottom left corner, Bottom right corner or Hidden.
Last button: choose the action of the last button, e.g. Metronome start/stop or Follow link point on screen.
While you annotate, the box is hidden.
All actions
You can put these actions on pedal keys, tap zones, the last button of the quick action box, MIDI actions and smart buttons:
Next page / Previous page – turn the page. In the "Vertical scrolling" layout the music moves on by almost a screen.
Forward two pages / Back two pages – two steps at once, e.g. to skip a page.
Next score – to the start of the next score in the setlist.
Previous score – to the start of the current score; if you are already there, to the previous score.
Start of score – back to the first page of the current score.
Follow link point on screen – follows the first visible link point to its target.