Handbuch › Gemeinsam spielen
Gruppen und Teilen
Eine Gruppe ist eine Bibliothek, die du mit anderen Menschen teilst – zum Beispiel mit deiner Band, deinem Chor oder deinem Orchesterregister.
Dein Profil
Beim ersten Start legt Notenpult ein Profil für dich an. Du findest es ganz oben unter Einstellungen › Dein Profil.
- Anzeigename: So sehen dich die anderen Mitglieder deiner Gruppen. Ändern kannst du ihn mit dem Stift-Symbol. Ein neuer Name erreicht die anderen mit dem nächsten Abgleich.
- Fingerabdruck: eine kurze Zeichenfolge, die dich eindeutig erkennbar macht. Beim Einladen vergleicht der Admin diesen Fingerabdruck, damit sich niemand als du ausgeben kann.
Deine erste Bibliothek („Meine Noten“) ist deine persönliche Gruppe: Nur du und deine eigenen Geräte gehören dazu. Sie erzeugt keinerlei Netzwerkverkehr, solange du keine weiteren Geräte koppelst. Ein Konto gibt es nicht – das Profil liegt nur auf deinen Geräten (mehr dazu unter Datenschutz).
Neue Gruppe gründen
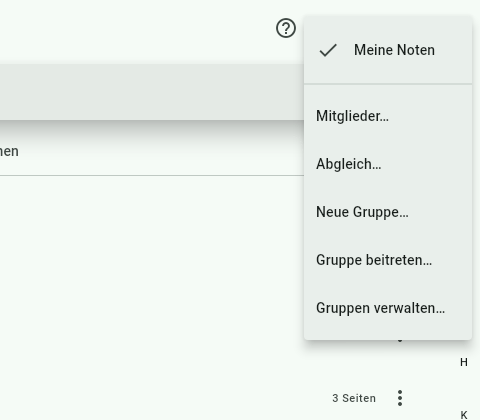
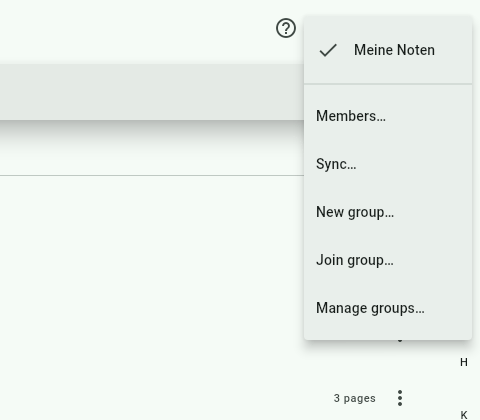
Oben rechts in der Bibliothek steht der Name der geöffneten Gruppe mit einem kleinen Pfeil. Das ist der Gruppenwechsler (Tooltip Gruppen). Darüber wechselst du zwischen deinen Gruppen und findest alle Gruppen-Befehle: Mitglieder…, Abgleich…, Neue Gruppe…, Gruppe beitreten… und Gruppen verwalten….
So geht's:
- Tippe auf den Gruppenwechsler und wähle Neue Gruppe….
- Gib einen Gruppennamen ein.
- Unter Windows und Android kannst du zusätzlich einen Ordner für die Bibliothek wählen (im Browser nur Chrome/Edge am Computer, experimentell). Ohne Auswahl landet sie am Standardort.
- Tippe auf Anlegen. Du bist jetzt Admin der neuen Gruppe.
Unter Gruppen verwalten… siehst du alle Gruppen auf diesem Gerät. Dort kannst du die geöffnete Gruppe umbenennen oder eine Gruppe von diesem Gerät löschen. Eine Gruppe für alle umbenennen können nur Admins – entweder dort oder unter Mitglieder… mit dem Stift neben dem Gruppennamen (Gruppe umbenennen). Der neue Name erscheint nach dem Abgleich auf allen Geräten.
Mitglieder einladen
Nur Admins können einladen. Öffne Gruppenwechsler › Mitglieder….
So geht's:
- Tippe auf Mitglied einladen.
- Unter Windows und Android fragt die App, ob du Im selben WLAN abgleichen möchtest. Das ist empfohlen: Das eingeladene Gerät holt die Einladung dann direkt bei dir ab und schickt seine Anfrage zurück.
- Tippe auf Einladung erstellen. Es erscheint ein QR-Code mit dem Text der Einladung.
- Lass die neue Person den QR-Code scannen – oder schicke ihr den Text (Kopieren) bzw. die Datei (Als Datei speichern), etwa per Messenger oder E-Mail.
Wichtig zu wissen:
- Eine Einladung gilt 24 Stunden und ist für eine Person. Für jede weitere Person erstellst du eine neue.
- Mit „Im selben WLAN abgleichen“ funktioniert der QR-Code nur im selben WLAN und nur in der App für Windows/Android. Ohne WLAN gibst du den Text oder die Datei weiter.
- Bis du den Beitritt bestätigst, bekommt das neue Gerät keinerlei Inhalte der Gruppe.
Browser oder iPad einladen
Wer Notenpult im Browser nutzt (zum Beispiel auf dem iPad), kann den normalen QR-Code im WLAN nicht verwenden. Dafür gibt es unter Mitglieder an einem Windows- oder Android-Gerät den Knopf Browser/iPad einladen:
- Tippe auf Browser/iPad einladen. Es erscheint ein Verbindungscode.
- Im Browser: Gruppenwechsler › Gruppe beitreten… und den Code scannen.
- Der Browser zeigt nun seinerseits einen Code. Tippe am Windows-/Android-Gerät auf Code des Browsers scannen und scanne ihn.
- Bestätige den Beitritt. Die Inhalte der Gruppe kommen gleich über diese Verbindung.
Beide Geräte müssen im selben WLAN sein (kein Gäste-WLAN mit Client-Isolation). Lädt jemand vom Browser aus ein, geht das nur per Text oder Datei.
Einer Gruppe beitreten
So geht's:
- Tippe auf den Gruppenwechsler und wähle Gruppe beitreten….
- Scanne den QR-Code der Einladung mit QR-Code scannen, füge den Text ein oder öffne die Einladungsdatei mit Datei öffnen….
- Prüfe Gruppenname, Admin und Fingerabdruck und tippe auf Beitreten.
- Die App zeigt deine Beitrittsanfrage als QR-Code, Text oder Datei. Im selben WLAN geht sie automatisch an das Admin-Gerät, und die Gruppe kommt nach der Bestätigung von selbst.
- Ohne WLAN schickst du die Anfrage dem Admin. Er schickt dir ein Gruppenpaket zurück, das du unter Mitglieder… › Gruppenpaket importieren einliest. Danach erscheint Du bist jetzt Mitglied der Gruppe.
Bis zur Bestätigung ist die Gruppe schon in deinem Gruppenwechsler, aber noch leer. Unter Mitglieder… steht dann Beitritt ausstehend; mit Beitrittsanfrage anzeigen rufst du die Anfrage erneut auf.
Mit dem Beitritt erlaubst du, dass diese Gruppe mit den Geräten der anderen Mitglieder abgleicht. In dem Moment selbst wird nichts gesendet.
Beitritt bestätigen (Admins)
- Im WLAN: Unter Mitglieder erscheint die Liste Beitrittsanfragen. Tippe auf eine Anfrage, vergleiche den Fingerabdruck mit dem auf dem Gerät der Person und tippe auf Aufnehmen. Mit Ablehnen verwirfst du sie.
- Per Text oder Datei: Tippe auf Beitrittsanfrage prüfen, scanne oder füge die Anfrage ein, vergleiche den Fingerabdruck und tippe auf Aufnehmen. Schicke das angezeigte Gruppenpaket an die Person zurück.
Die App warnt dich, wenn etwas nicht stimmt, zum Beispiel: Die Einladung war abgelaufen. oder Diese Einladung wurde schon von jemand anderem benutzt. Eine schon benutzte Einladung kannst du nur bewusst mit Trotzdem aufnehmen annehmen.
Mitglieder verwalten
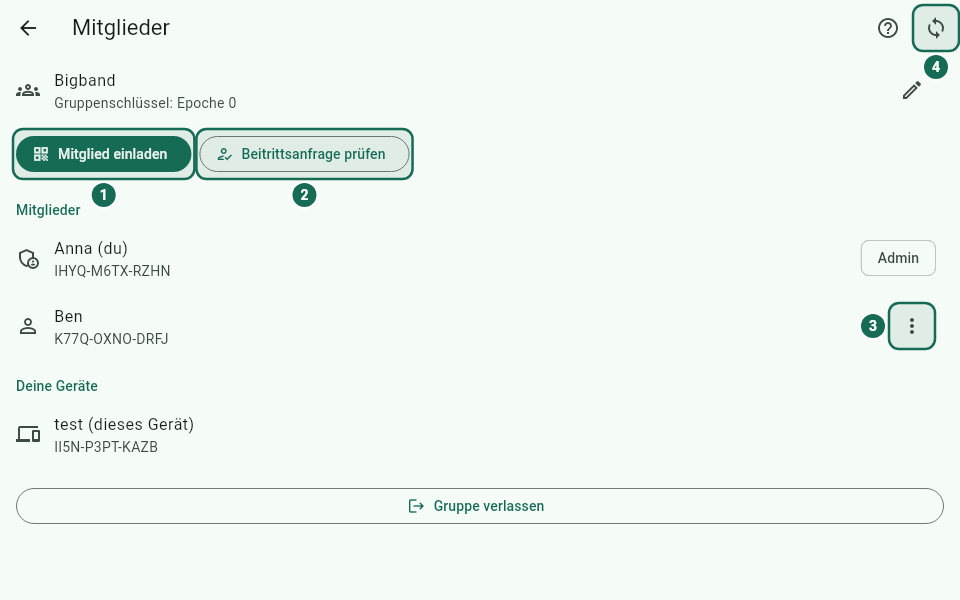
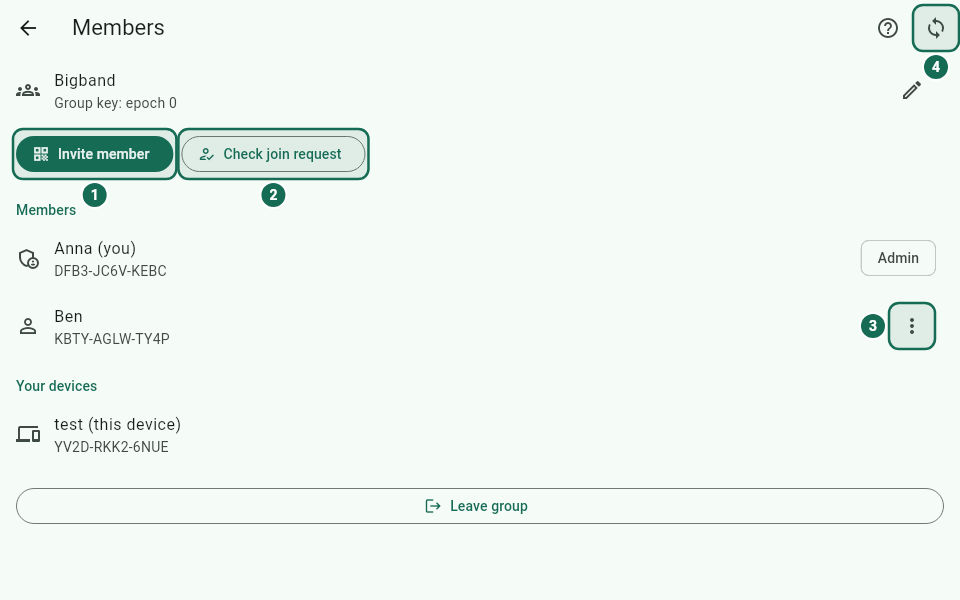
Unter Gruppenwechsler › Mitglieder… siehst du:
- den Gruppennamen, darunter den aktuellen Stand des Gruppenschlüssels,
- alle Mitglieder mit Name und Fingerabdruck (du selbst mit „(du)“),
- Deine Geräte: alle deine eigenen Geräte in dieser Gruppe,
- für Admins: Beitrittsanfragen und Ehemalige Mitglieder.
Oben rechts führt das Symbol Abgleich direkt zu den Abgleich-Einstellungen.
Neben jedem Stück in der Bibliothek, das jemand anderem gehört, steht zum Beispiel „von Anna“ (siehe Eigentümer).
Inhalte ehemaliger Mitglieder übernehmen
Hat jemand die Gruppe verlassen, gehören seine geteilten Stücke und Setlisten weiter dieser Person – niemand kann sie mehr ändern. Admins sehen solche Personen unter Ehemalige Mitglieder und können die Inhalte mit Übernehmen in ihren eigenen Besitz holen.
Admins
Admins dürfen einladen, Beitritte bestätigen, Mitglieder entfernen, die Gruppe umbenennen und anderen die Admin-Rolle geben. Wer eine Gruppe gründet, ist ihr erster Admin.
So geht's: Tippe bei einem Mitglied auf das Menü (Aktionen für das Mitglied) und wähle Zum Admin machen oder Admin-Rolle entziehen.
Eine Gruppe kann mehrere Admins haben. Das ist sinnvoll, damit auch dann jemand Beitritte bestätigen kann, wenn ein Admin nicht da ist. Hat eine Gruppe keinen Admin mehr, wird automatisch das Mitglied Admin, das am längsten dabei ist.
Wer sieht was?
Du entscheidest selbst, was die Gruppe sieht. In deiner persönlichen Gruppe gibt es diese Auswahl nicht – dort ist ohnehin alles nur für dich.
Stücke und Setlisten
- Beim Import fragt die App Sichtbar für: Nur ich oder Gruppe. Vorgabe ist deine zuletzt gewählte Einstellung in dieser Gruppe.
- Später ändern: Im Menü eines eigenen Stücks in der Bibliothek bzw. im Menü einer eigenen Setliste wählst du Wer sieht es….
- Erweitern (von „Nur ich“ auf „Gruppe“) geht jederzeit. Schränkst du ein, warnt die App: Was andere schon erhalten haben, behalten sie.
- Beim ersten Teilen erscheint einmal der Hinweis Noten teilen: Teile nur Noten, die die Gruppe nutzen darf – zum Beispiel für die Gruppe gekaufte oder gemeinfreie Noten. Notenpult prüft keine Rechte.
Nur wer ein Stück oder eine Setliste besitzt, ändert Titel, Seiten, Reihenfolge und Setlisten-Inhalt. Deine eigenen Wiedergabe-Einstellungen an fremden Stücken (zum Beispiel Audio-Tempo, Metronom, Auto-Scroll, Anzeige oder Übe-Markierungen) bleiben privat und werden nur mit deinen eigenen Geräten abgeglichen. Das Stück des Eigentümers bleibt dabei unverändert.
Annotationsebenen
Jede Annotationsebene hat ihre eigene Sichtbarkeit. Im Ebenen-Menü des Annotations-Editors tippst du bei einer eigenen Ebene auf Teilen und wählst:
- Nur ich (Vorgabe für neue Ebenen),
- Personen – unter Personen auswählen hakst du einzelne Mitglieder an,
- Gruppe.
Mit Andere dürfen bearbeiten erlaubst du allen, die die Ebene sehen, darauf zu zeichnen. Ebenen anderer Personen zeigen den Namen der Person („von Anna“) und lassen sich einzeln ausblenden. Mehr dazu unter Ebenen teilen.
Eigene Geräte koppeln
Nutzt du Notenpult auf mehreren eigenen Geräten (zum Beispiel Tablet und Laptop), koppelst du sie. Dann haben alle Geräte dasselbe Profil, alle deine Gruppen und auch deine privaten Inhalte.
So geht's (Windows und Android, beide im selben WLAN):
- Auf dem Gerät, das schon eingerichtet ist: Einstellungen › Dein Profil › Gerät hinzufügen. Es erscheint ein QR-Code, darunter eine Adresse und ein Code.
- Auf dem neuen Gerät: Einstellungen › Dein Profil › Mit vorhandenem Gerät koppeln. Scanne den QR-Code oder gib Adresse und Code ein (zum Beispiel 192.168.1.20:47913 ABCD-EFGH).
- Beide Geräte zeigen jetzt einen 6-stelligen Code. Vergleiche ihn und tippe auf beiden Geräten auf Gleicher Code.
- Fertig: Gerät gekoppelt. Danach gleichen die Geräte ab.
Das neue Gerät übernimmt dein Profil. Leere Gruppen auf dem neuen Gerät werden entfernt, andere bleiben als persönliche Gruppen erhalten. Nach fünf falschen Versuchen bricht das Koppeln ab – starte dann Gerät hinzufügen neu.
Browser oder iPad koppeln
- Am Windows- oder Android-Gerät: Gerät hinzufügen › Browser/iPad.
- Im Browser: Einstellungen › Dein Profil › Mit vorhandenem Gerät koppeln und den Code scannen.
- Der Browser zeigt einen Antwort-Code. Scanne ihn am anderen Gerät mit Code des Browsers scannen.
- Code vergleichen, bestätigen – das Gerät wird gekoppelt und gleich abgeglichen.
Zwei Browser können sich nicht miteinander koppeln; es braucht immer ein Windows- oder Android-Gerät.
Gerät entfernen, Mitglied entfernen, Gruppe verlassen
Eigenes Gerät entfernen
Hast du ein Gerät verloren oder abgegeben: Mitglieder… › Deine Geräte, beim Gerät auf Gerät entfernen tippen. Das Gerät bekommt keine neuen Inhalte dieser Gruppe mehr, ein neuer Gruppenschlüssel wird verteilt. Das gilt pro Gruppe – entferne das Gerät also in jeder Gruppe. Deine privaten Inhalte kann es weiter lesen, bis du ein neues Profil anlegst.
Mitglied entfernen (Admins)
Menü beim Mitglied › Aus der Gruppe entfernen. Automatisch entsteht ein neuer Gruppenschlüssel; die Person erhält nichts Neues mehr. Was sie schon hatte, behält sie.
Gruppe verlassen
Mitglieder… › Gruppe verlassen. Deine privaten Inhalte bleiben auf deinen Geräten; was andere schon haben, behalten sie. Danach kannst du die Gruppe unter Gruppen verwalten… von deinem Gerät löschen. Deine persönliche Gruppe kannst du nicht verlassen.